Customisations
In the customization menu you can personalize the way the widgets look. It contains 5 submenus, corresponding to:
- Notifications
- Widgets
- E-mail templates
- E-mail providers
- Storage providers
Notifications
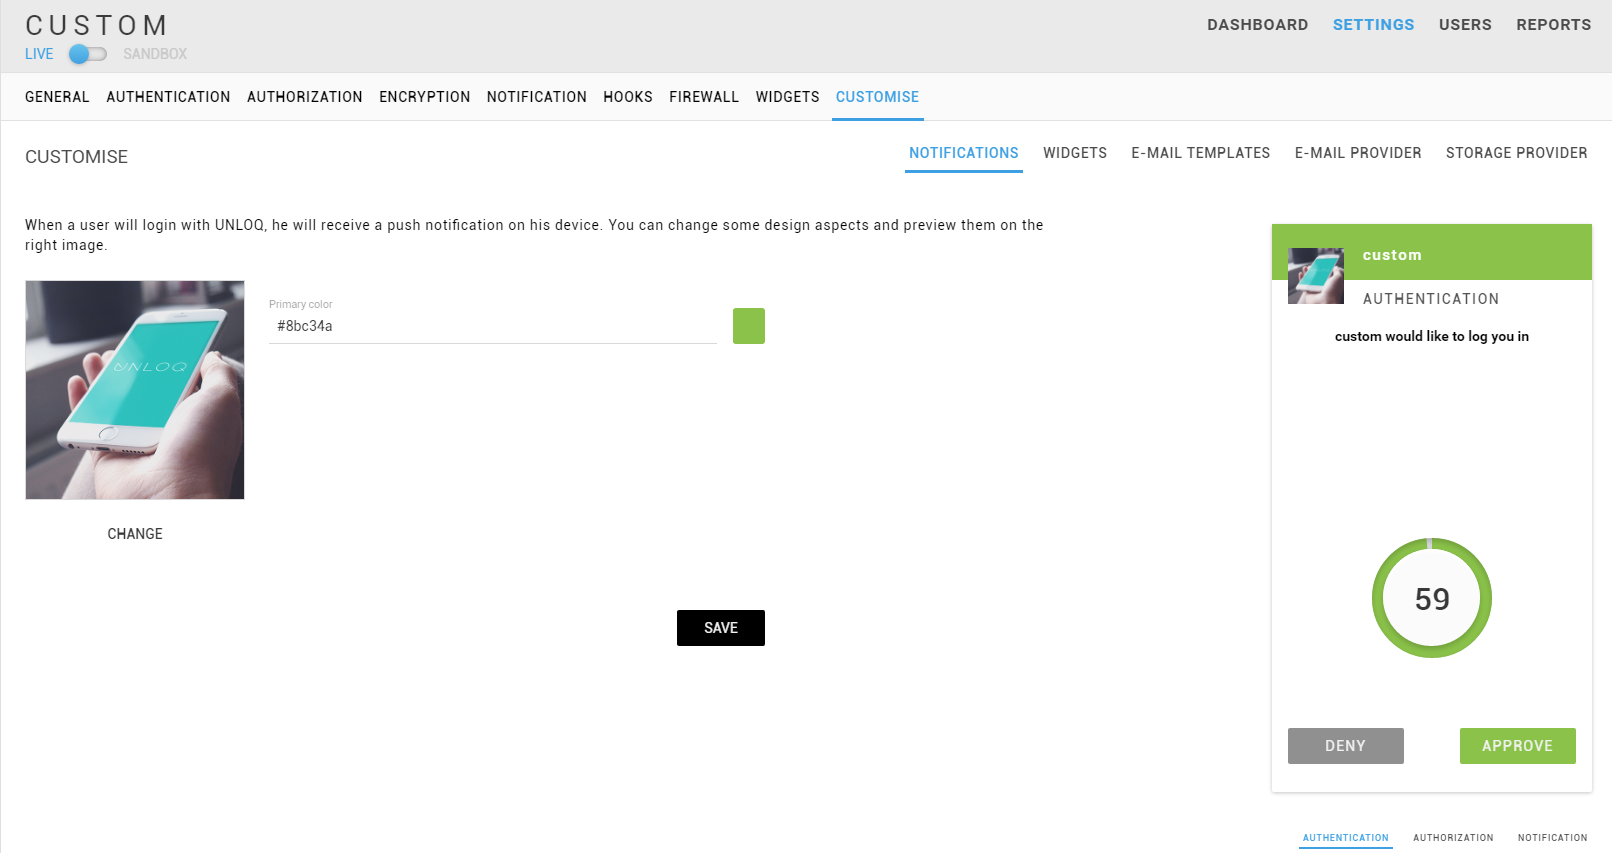
In the Notifications menu you can change the Application logo (220x220 px), and choose the primary color for the notifications.

Under the widget on the right, you can preview the appearance of Authentication, Authorization notifications, as well as that of Notifications.
Widgets
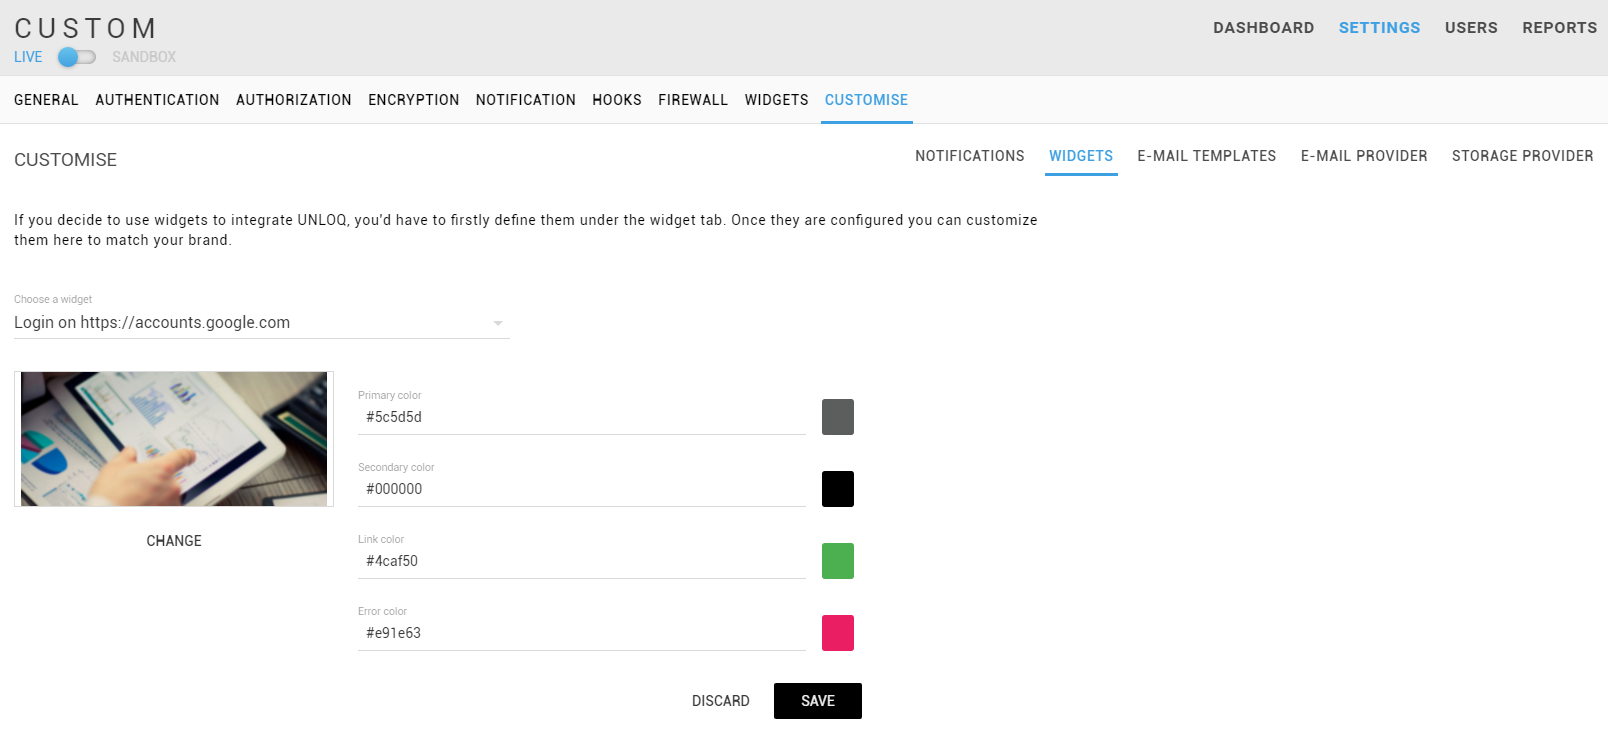
This sub-menu tab is used when you have already set up widgets to integrate UNLOQ. After defining them in the Widgets tab, you can customize them to match your brand’s visual identity. Choose the widget you want to customize form the dropdown list, and then choose the Widget image, Primary, Secondary, Link and Error colors.
The primary color will set the background-color of the widget's header, while the secondary color will set the button color as well as the complete-animation background color. The link color will be used when displaying anchors in the widget and the error color will be used when an error occurs.

E-mail templates
UNLOQ has a few cases when it has to send out e-mails to your end users. By default, the layout that we use for these templates contains our own branding information and content. When generating your custom mobile app, you can change how your users view e-mails coming from us.
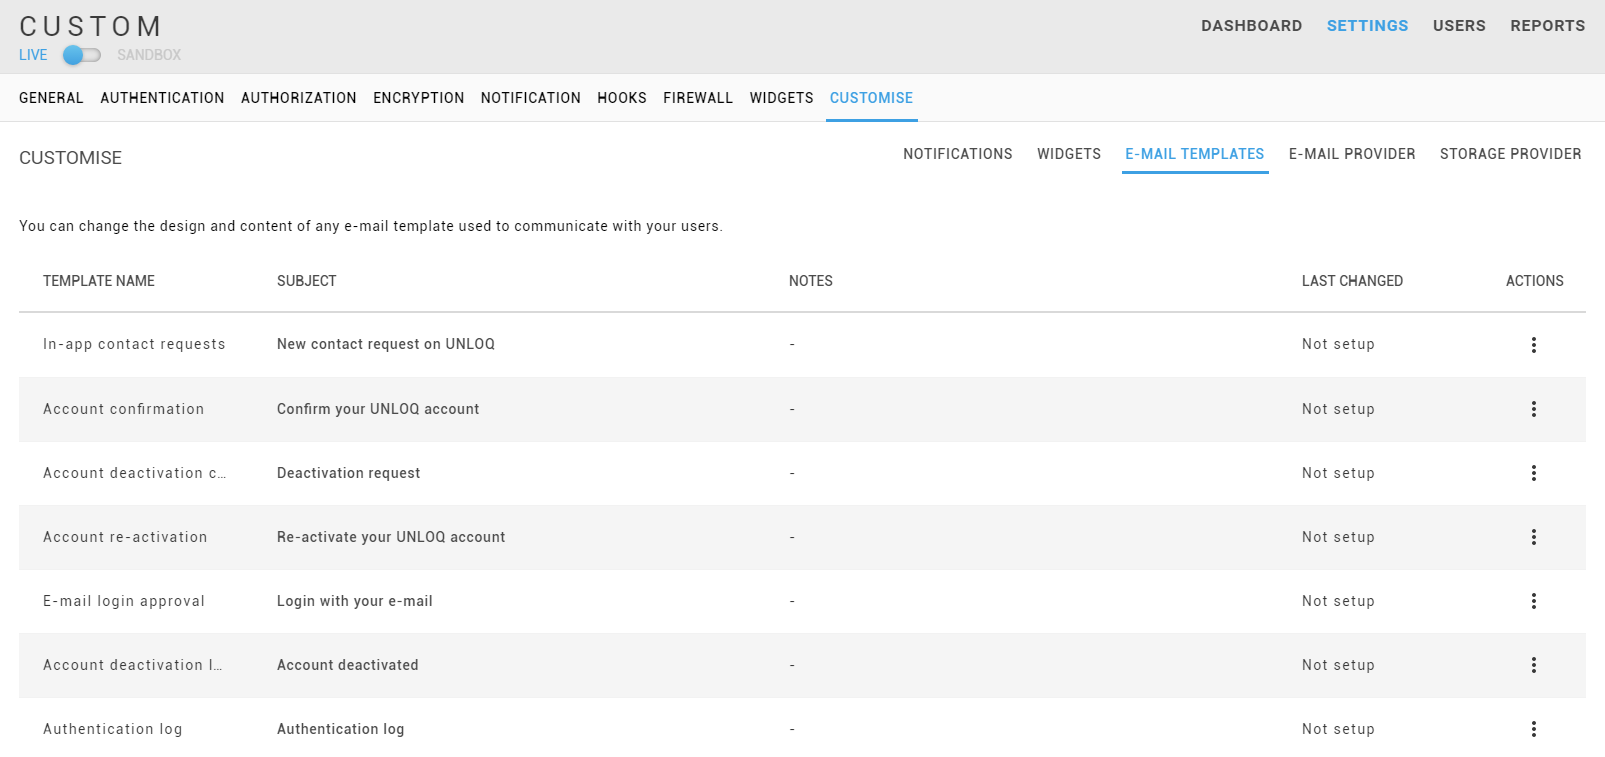
In order to change an e-mail template, navigate to your application's E-mail templates menu and select the template you wish to change.

A few situations when we send an e-mail to a user are described below:
- Administrative contact - This template is used when one of your users is sending you a contact request. It will generally end up in your specified e-mail provider admin.
- Login request - If you enable Login with e-mail for your application, this template is used when sending out the authentication link.
- Account activation - The template is sent when a new user downloads your custom mobile app and initiates the account setup on their phone.
- Account de-activation - This template is used when a user has initiated the device de-activation process.
- Account re-activation - This template is used when a user has previously de-activated his device and is re-activating his account on a different device.
- Authentication log - The template is used when your users choose to be notified whenever they authenticate using UNLOQ on one of your applications.
- Deactivation log - The template is used when a user has successfully de-activated his device.
Some e-mail templates may contain various variables, such as $APP_DOMAIN or $MESSAGE which you should include in the actual e-mail HTML. You can also preview the template you're currently editing. Once you're done editing and saving, you can enable or disable the template.
E-mail provider
By default, all transactional e-mails will be sent from our domain (usually no-reply@unloq.io), using our own provider. You can create a custom e-mail provider for your application by clicking the E-mail providers category, and selecting the desired provider. This will allow you to use your own e-mail provider with your own domain and sender e-mail. We currently support Mailgun.com, AWS and Mandrill. Each provider will require a specific set of credentials that you can find in their associated dashboard.

You can then customize the sender's name and e-mail (eg: My Company INC <no-reply@my-company.com>), enter your administrator e-mail (you will receive contact requests and other administrative e-mails) and additionally, specify the reply-to e-mail.
Note: When selecting the AWS e-mail provider, it is required that you have a verified SES account in one of AWS's regions, since new users are immediately placed in sandbox. Fore more information, please visit the official docs.
Once you've defined the e-mail provider of your application, it will be used to send all outgoing e-mails, using the settings you've specified.
Storage provider
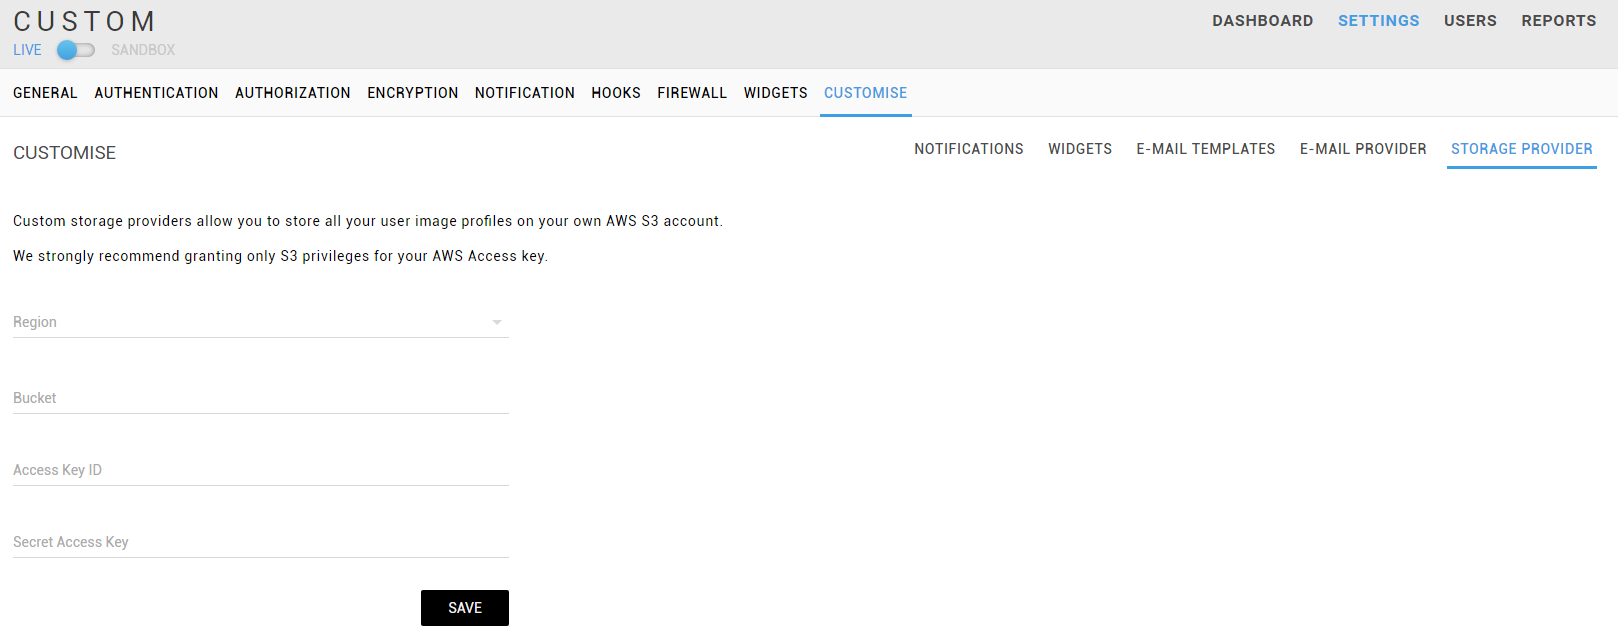
By default, all user generated assets are stored on UNLOQ's storage provider using our own bucket and settings. However, you can choose to store these assets on your own S3 bucket using your own credentials.

We currently support AWS S3 as the only provider, therefore you can find additional information about how to create an Access key and an S3 storage bucket on their official documentation.
When creating a storage provider, you are asked to select the geographical region of the bucket, the bucket name and your key credentials. We strongly recommend you create a new IAM user with only S3 Full Access permission on the specified bucket, so that the UNLOQ API can only upload assets.
Have a question? You can always send us an email at support@unloq.io, or contact us on chat.
For security related concerns, please visit our Security page.

